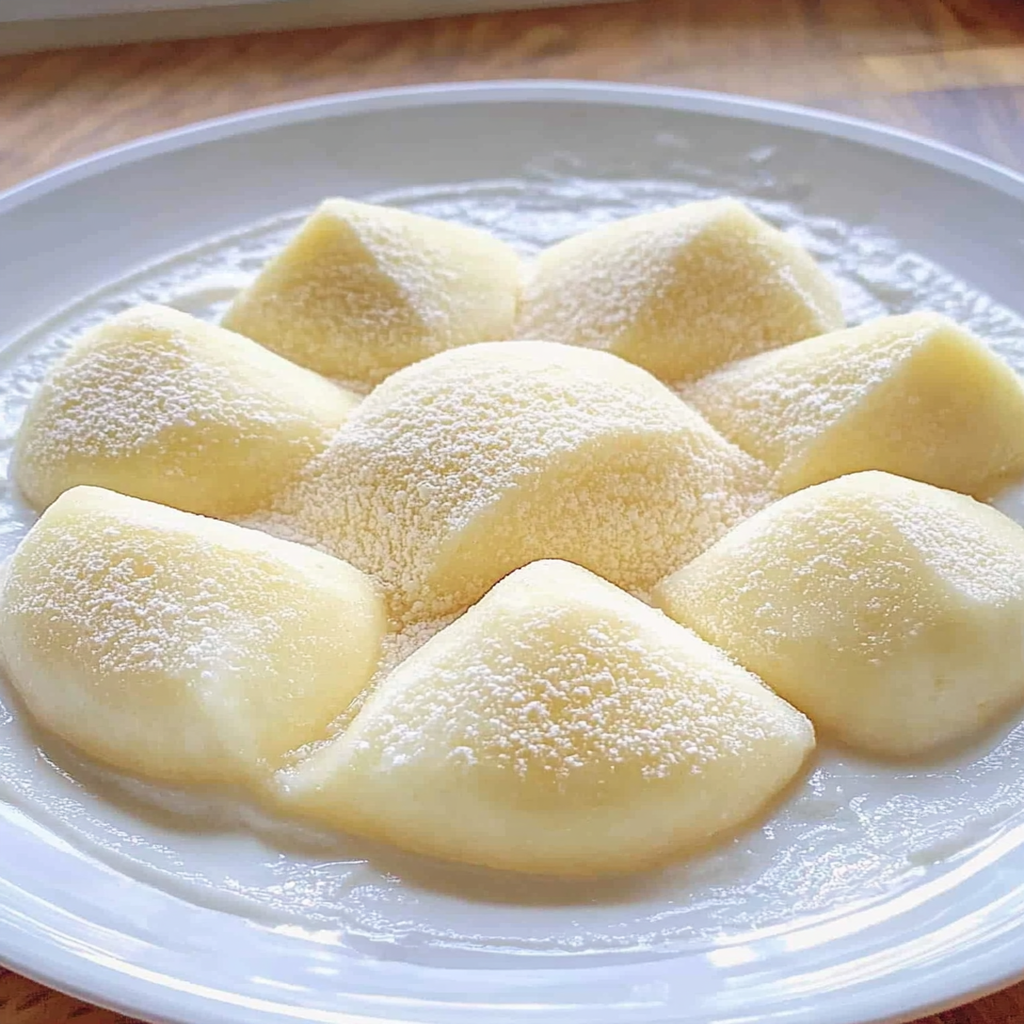
Milk mochi is a delightful treat that combines the chewy goodness of mochi with the rich creaminess of milk, creating an irresistible dessert that will make your taste buds dance. perfect pairing with mochi Imagine biting into a soft, pillowy piece of mochi, and feeling that perfect blend of flavors as it melts in your mouth.
This Milk Mochi Recipe is not just a dessert; it’s a memory maker. I remember the first time I tried mochi at an Asian market—my eyes widened like saucers as I discovered how this simple treat could be so satisfying. floral sugar cookies recipe Whether it’s for a cozy movie night or a festive gathering, milk mochi brings joy to every occasion and leaves everyone asking for seconds.
Why You'll Love This Recipe
- This milk mochi recipe is incredibly easy to prepare, making it perfect for both beginners and seasoned cooks.
- Its unique flavor profile offers a delightful blend of sweetness and creaminess that’s hard to resist.
- The visually appealing translucent texture adds charm to any dessert table.
- Plus, you can customize your toppings to match your mood or the season!
Ingredients for Milk Mochi Recipe
Here’s what you’ll need to make this delicious dish:
- Mochiko (Sweet Rice Flour): This special flour gives mochi its signature chewy texture. It’s essential for achieving that perfect consistency.
- Granulated Sugar: This adds sweetness to the mochi and balances the richness of the milk.
- Coconut Milk: Using coconut milk gives the mochi a creamy, tropical flavor that elevates it beyond ordinary desserts.
- Water: A key component to help combine all ingredients smoothly.
- Potato Starch: Dusting with potato starch prevents sticking while handling the dough.
How to Make Milk Mochi Recipe
Follow these simple steps to prepare this delicious dish:
Step 1: Prepare Your Workstation
Start by dusting your work surface with potato starch. This will help prevent sticking later on when you shape your mochi.
Step 2: Mix Dry Ingredients
In a large mixing bowl, combine one cup of mochiko and half a cup of granulated sugar. Whisk them together until well blended.
Step 3: Add Wet Ingredients
Gradually pour in one cup of coconut milk and half a cup of water into the dry mix. Stir until you achieve a smooth batter without lumps.
Step 4: Steam the Mixture
Transfer the mixture into a heatproof dish and cover it tightly with foil. Place it in a steamer over boiling water and steam for about 25 minutes until it becomes translucent and firm.
Step 5: Cool Down
Once cooked, carefully remove it from the steamer (watch out for steam burns). Let it cool for about ten minutes before transferring it onto your prepared surface dusted with more potato starch.
Step 6: Shape Your Mochi
Once cooled enough to handle, sprinkle more starch on top and cut the dough into small squares or shapes using a knife or cookie cutter. Toss each piece in additional potato starch to keep them from sticking together.
Serve these delightful morsels at room temperature or chilled! You can even roll them in chopped nuts or serve them alongside fresh fruits for an added zing. Enjoy your homemade milk mochi!
You Must Know
- This delightful Milk Mochi Recipe is not just a treat for your taste buds; it brings a sense of nostalgia and joy.
- With its chewy texture and sweet flavor, it’s perfect for any occasion.
- You can easily customize the fillings based on what you love.
Perfecting the Cooking Process
To achieve that perfect chewy texture in your Milk Mochi, start by mixing the glutinous rice flour with milk and sugar until smooth. Then, steam the mixture until it becomes translucent and sticky before shaping into delightful little mochi balls.
Add Your Touch
Feel free to customize your Milk Mochi! Swap out regular milk for coconut or almond milk for a twist. Add flavors like matcha or vanilla to elevate your mochi game, or stuff them with red bean paste or fresh fruit for an extra surprise.
Storing & Reheating
Store any leftover Milk Mochi in an airtight container at room temperature for up to three days. If you want to enjoy them warm, simply microwave them for a few seconds to regain that soft, chewy goodness.
Chef's Helpful Tips
- For perfectly chewy mochi, ensure your glutinous rice flour is fresh; old flour can lead to undesirable textures.
- Always steam rather than boil your mixture to maintain moisture without waterlogging.
- Use cornstarch when shaping to prevent sticking and keep your hands clean.
It was during a rainy afternoon when I first made this Milk Mochi Recipe with my little niece. Her giggles as we shaped the mochi brought so much joy and turned cooking into a fun adventure we still laugh about today.
FAQs :
What is the best way to store Milk Mochi?
To keep your Milk Mochi fresh, store it in an airtight container at room temperature for up to three days. If you want to preserve it longer, refrigerate it for up to a week. Just remember to let it sit at room temperature for a bit before serving, as cold mochi can be tough and chewy. Avoid freezing Milk Mochi, as it may change the texture once thawed.
Can I customize the flavors in my Milk Mochi Recipe?
Absolutely! While the classic Milk Mochi recipe is delicious on its own, you can easily customize it. Consider adding flavors like matcha, cocoa powder, or fruit purees to the dough. You can also incorporate fillings such as sweet red bean paste or fresh fruit for a unique twist. Experimenting with different flavors can make your mochi experience even more enjoyable.
Is Milk Mochi gluten-free?
Yes, Milk Mochi is naturally gluten-free since it primarily uses glutinous rice flour, which does not contain gluten. However, always check that your other ingredients are gluten-free if you are preparing this treat for someone with a gluten intolerance or celiac disease. By ensuring all components are gluten-free, you can enjoy this delightful snack without worry.
How long does it take to make Milk Mochi from start to finish?
Making Milk Mochi typically takes about 30 minutes from start to finish. This includes preparation time and cooking. After mixing your ingredients, steaming the mochi usually requires around 20 minutes. Once steamed, allow the mochi to cool slightly before cutting and enjoying. It’s a quick and rewarding recipe that brings delightful flavors in no time!
Conclusion for Milk Mochi Recipe :
In summary, the Milk Mochi Recipe offers a delightful combination of chewy texture and sweet flavor that is easy to prepare at home. By following simple steps and customizing flavors, you can create a treat that everyone will love. light summer dessert option Remember to store your mochi properly for maximum freshness and explore various fillings to enhance your experience. Enjoy making this delicious Japanese delicacy with friends and family!
Milk Mochi
- Total Time: 35 minutes
- Yield: Approximately 12 servings 1x
Description
Milk mochi is a scrumptious fusion of chewy texture and creamy sweetness, combining the rich flavors of coconut milk with sweet rice flour. This easy-to-make treat melts in your mouth, making it perfect for any occasion. Whether enjoyed chilled or at room temperature, each soft morsel invites you to savor every bite. Customize your milk mochi with various toppings or fillings to elevate this delightful Japanese delicacy into a personal favorite!
Ingredients
- 1 cup mochiko (sweet rice flour)
- 1/2 cup granulated sugar
- 1 cup coconut milk
- 1/2 cup water
- Potato starch (for dusting)
Instructions
- Dust your work surface with potato starch to prevent sticking.
- In a large bowl, whisk together mochiko and sugar until well combined.
- Gradually add coconut milk and water to the dry mixture; stir until smooth.
- Pour the batter into a heatproof dish, cover with foil, and steam over boiling water for about 25 minutes until translucent and firm.
- Allow to cool for 10 minutes, then transfer to the dusted surface.
- Cut into small squares or desired shapes, dusting each piece with more potato starch to prevent sticking.
- Prep Time: 10 minutes
- Cook Time: 25 minutes
- Category: Dessert
- Method: Steaming
- Cuisine: Japanese
Nutrition
- Serving Size: 1 piece (30g)
- Calories: 70
- Sugar: 7g
- Sodium: 5mg
- Fat: 1g
- Saturated Fat: 1g
- Unsaturated Fat: 0g
- Trans Fat: 0g
- Carbohydrates: 15g
- Fiber: 0g
- Protein: 1g
- Cholesterol: 0mg


