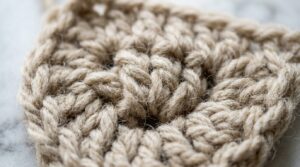
Rustic Crochet Dish Towel: Free Kitchen Pattern
A truly functional kitchen dish towel needs to be generously sized, heavily textured for scrubbing power, and durable enough to withstand daily washing. This rustic cotton crochet towel uses a combination of simple stitches to create a waffle-like texture that absorbs water beautifully while looking effortlessly stylish draped over your oven handle.

When I started testing patterns for kitchen towels, I found that standard single crochet fabrics were often too stiff, while open lacy stitches simply didn’t absorb enough water. I needed something that felt substantial and utilitarian, yet looked at home in a modern farmhouse kitchen. By using 100% unmercerized cotton and a slightly larger hook, this fabric drapes perfectly while retaining the intense scrubbability needed for drying pots and pans. Pattern tested & hooked right here in my studio.
Maker’s Project Blueprint
- Skill Level: Advanced Beginner
- Finished Dimensions: 14 x 20 inches (35.5 x 51 cm) unblocked
- Yarn Requirements: ~250 yards (230 m) of 100% medium worsted (#4) kitchen cotton
- Hook Size: US I/9 (5.5 mm) ergonomic crochet hook
- Completion Time: 3 to 4 hours
- Testing Note: Pattern tested & hooked by Julian Brooks in natural cream kitchen cotton.
Materials & Tools You’ll Need

- 100% Cotton Yarn: Unmercerized cotton is critical here; mercerized cotton has a sheen that repels water rather than absorbing it. Read more in our guide to the best cotton yarn for kitchen use.
- Crochet Hook: US I/9 (5.5 mm).
- Tapestry / Yarn Needle: For weaving in ends securely.
- Measuring Tape & Sharp Scissors: For checking dimensions and clean snips.
Stitch Abbreviations & Pattern Notes
- ch: chain
- sc: single crochet
- dc: double crochet
- fpdc: front post double crochet
- st(s): stitch(es)
- Special Technique (fpdc): Yarn over, insert hook from front to back to front around the post of the specified stitch, yarn over and pull up a loop, [yarn over and pull through 2 loops] twice.
Step-by-Step Pattern Instructions
Foundation Chain: Ch 50 (multiple of 3 + 2 for the turning chain).
Row 1: Starting in the 3rd ch from the hook, work 1 dc in each ch across. Turn. (48 dc)

Row 2: Ch 2 (does not count as a st), 1 dc in first st. *1 fpdc in next st, 1 dc in each of the next 2 sts; repeat from * across until 2 sts remain. 1 fpdc in next st, 1 dc in last st. Turn.
Row 3: Ch 2 (does not count as a st), 1 dc in first st. *1 dc in next st, 1 fpdc in each of the next 2 sts; repeat from * across until 2 sts remain. 1 dc in each of the last 2 sts. Turn.
Rows 4–46: Repeat Rows 2 and 3 until the towel measures approximately 19 inches long, ending on a Row 2 repeat.
Border & Clean Finishing: Ch 1, evenly work sc around all four edges, placing 3 sc in each corner. To create a hanging loop, ch 12 at the final corner before slip stitching to the first sc. Fasten off and weave in all yarn tails with a tapestry needle. Need help fixing uneven borders? Check out our article on why your crochet is curling and how to fix it.
3 Studio Testing Notes for Clean Results
1. Preventing Edge Curling: The waffle stitch naturally pulls inward. Ensure your turning chains are loose, and if the edges feel tight, jump up to a 6.0 mm hook for the border.
2. Consistent Tension Control: Pay close attention to your tension on the front post stitches. They must be worked loosely enough so they don’t scrunch the fabric, but tight enough to form distinct ridges.
3. Wet Blocking for Crisp Edges: A dish towel benefits immensely from wet blocking. Soak it, roll it in a dry towel to press out excess moisture, then pin it exactly to 14×20 inches. This sets the dimensions permanently.
How to Style & Use at Home

These towels are meant to be used heavily. I keep one draped over the oven handle for drying hands and another tucked in a drawer for drying large mixing bowls. When giving these as gifts, I like to roll them tightly and tie them with a neutral ribbon alongside a wooden spoon or handmade soap.
Care & Laundering Guide
- Washing: Machine wash cold or warm with similar cotton linens. Avoid chlorine bleach.
- Drying: Tumble dry on low. Expect slight shrinkage in the dryer (about 5%), which will only make the waffle texture deeper and more absorbent.
- Longevity: 100% kitchen cotton softens naturally with every cycle and becomes more absorbent the more it is washed.
Frequently Asked Questions
What is the best yarn for this project?
100% unmercerized worsted-weight kitchen cotton is the gold standard because it absorbs water quickly, withstands repeated heat, and never melts.
Why are the edges of my project curling?
Curling usually happens when the foundation chain or turning stitches are worked too tightly. Loosen your tension slightly or jump up half a hook size.
Can I resize this pattern?
Yes, simply adjust your starting chain by adding or subtracting multiples of 3 stitches until you reach your desired width.