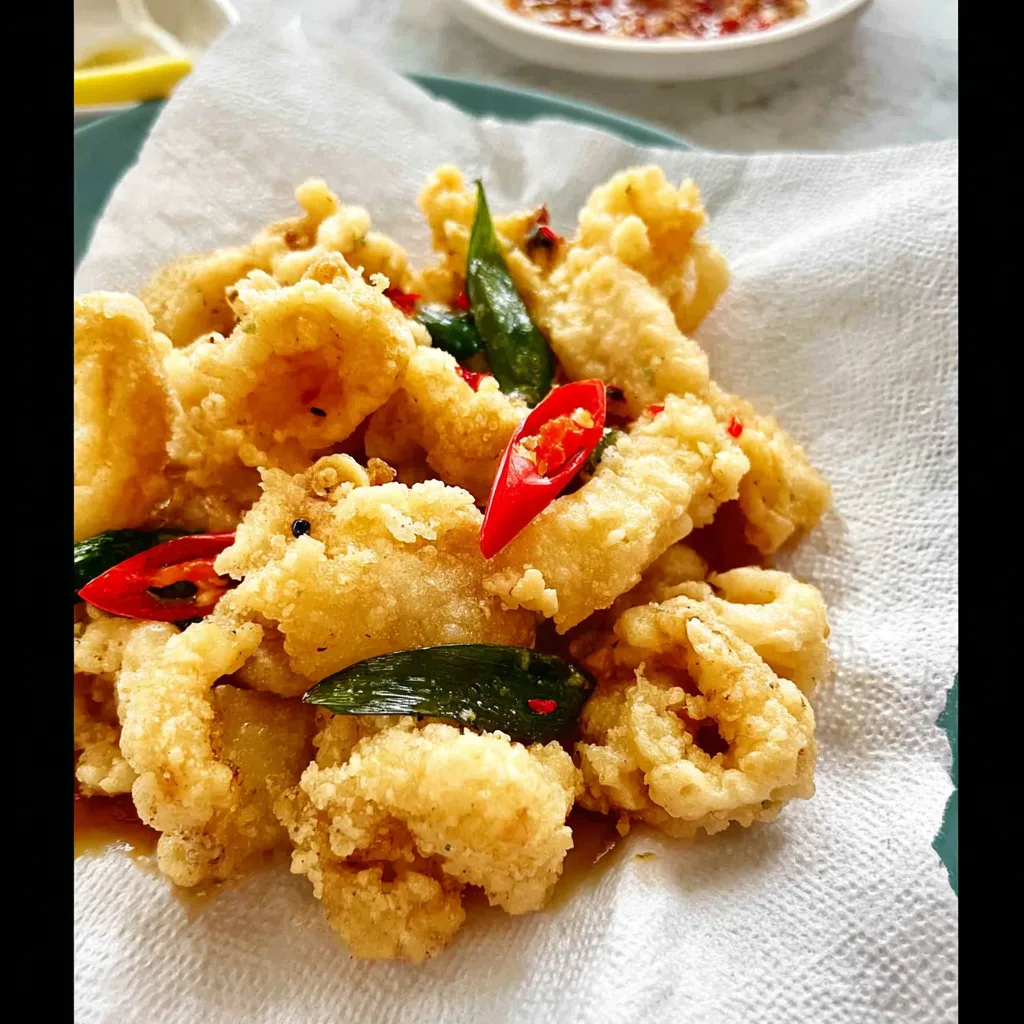
Imagine sinking your teeth into perfectly crispy Salt and Pepper Squid, where each bite unleashes a symphony of flavors, from the savory crunch to the delicate tenderness of the squid itself. The intoxicating aroma dances in the air, inviting you to savor this dish that’s not just food but an experience, ideal for lively gatherings or cozy nights at home.
As a child, I remember my family diving into a plate of this delightful dish during weekend get-togethers, laughter echoing around the table as we fought for the last piece. Whether you’re hosting friends or just craving something extraordinary on a Friday night, this Salt and Pepper Squid promises a flavor explosion that will leave everyone reminiscing long after the last bite.
Why Is Salt and Pepper Squid So Irresistibly Good?
Crispy perfection: This recipe delivers a golden-brown crunch that’s simply addictive!
Bold flavor: The simple seasoning of salt and pepper elevates the natural taste of squid, making every bite memorable.
Quick to prepare: In just 25 minutes, you can whip up this dish, perfect for busy weeknights or unexpected guests.
Versatile serving options: Enjoy it as an appetizer, a main course, or even tossed in a salad for added flair!
Crowd-pleaser: Impress family and friends with this delightful dish that’s sure to disappear fast at any gathering.
Salt and Pepper Squid Ingredients
- For the Squid
- 500 grams cleaned squid (cut into rings) – Fresh squid is ideal for achieving that perfect crispy texture.
- For the Batter
- 1 cup all-purpose flour – This helps create a light and crisp coating for your squid.
- 1 cup cornstarch – Cornstarch adds extra crunch and keeps the batter from becoming too heavy.
- 1 teaspoon salt – Enhances the flavor of the squid and the batter.
- 1 teaspoon black pepper – Adds a subtle heat that complements the dish beautifully.
- For the Oil
- 2 cups vegetable oil (for frying) – Use a neutral oil to ensure that the flavors of the Salt and Pepper Squid shine through.
How to Make Salt and Pepper Squid
1. Combine In a mixing bowl, combine 1 cup of all-purpose flour, 1 cup of cornstarch, 1 teaspoon of salt, and 1 teaspoon of black pepper. This will create a crispy batter that perfectly coats the squid.
2. Dredge Take your 500 grams of cleaned squid cut into rings and dredge them in the batter mixture. Ensure each piece is generously coated for that delightful crunch!
3. Heat In a frying pan, heat 2 cups of vegetable oil over medium-high heat until shimmering. This is the key to achieving that perfect golden-brown color on your squid.
4. Fry Carefully fry the squid in batches for about 2-3 minutes, or until they turn beautifully golden brown. Avoid overcrowding the pan to maintain crispy texture.
5. Drain Once fried, remove the squid and let them drain on paper towels to absorb excess oil. This keeps your Salt and Pepper Squid light and crispy!
6. Serve Finally, serve hot, garnished with additional salt and pepper if desired. Enjoy this mouthwatering dish as an appetizer or main course!
Optional: Serve with a squeeze of fresh lemon for an extra zing!
Exact quantities are listed in the recipe card below.
Tips for the Best Salt and Pepper Squid
- Freshness Matters: Use the freshest squid possible for the best taste and texture. Avoid pre-frozen squid if you can.
- Perfect Dredging: Ensure that each squid ring is well-coated in the batter mixture; this helps achieve that crispy outer layer.
- Oil Temperature Check: Maintain medium-high heat when frying. If the oil is too cool, the squid will become greasy instead of crispy.
- Batch Frying: Fry in small batches to avoid overcrowding the pan, which can lower the oil temperature and lead to soggy squid.
- Drain Properly: After frying, let the squid drain on paper towels to remove excess oil. This keeps them crispier until served.
- Seasoning Before Serving: For extra flavor, lightly sprinkle additional salt and pepper right before serving your crispy Salt and Pepper Squid.
How to Store and Freeze Salt and Pepper Squid
- Room Temperature: Enjoy your Salt and Pepper Squid immediately after frying for the best texture. Avoid leaving it out for more than 2 hours to ensure safety.
- Fridge: Store leftover squid in an airtight container in the fridge for up to 3 days. Reheat in a hot pan for a few minutes to regain crispiness.
- Freezer: If you need to freeze unused squid, place it in a single layer on a baking sheet until solid, then transfer to a freezer bag. Use within 2 months for optimal taste.
- Reheating: For the crispiest result, reheat fried squid in an air fryer or oven at 375°F (190°C) for about 5-7 minutes. Avoid microwaving, as it can make them soggy.
Make Salt and Pepper Squid Your Own
Feel free to get creative and add your personal touch to this delightful dish!
- Spicy Kick: Add 1 teaspoon of cayenne pepper to the batter for an extra layer of heat. The added spice will not only invigorate the flavor but also give a beautiful warmth to each bite.
- Herb Infusion: Mix in 1 tablespoon of dried oregano or thyme into the flour for a fragrant twist. Fresh herbs can elevate the dish, adding a lovely aroma that complements the squid perfectly.
- Gluten-Free: Substitute the all-purpose flour with a gluten-free blend and ensure the cornstarch is certified gluten-free. This way, everyone can enjoy this crispy delight without missing out on flavor.
- Crispy Panko: Replace half of the cornstarch with panko breadcrumbs for an even crunchier coating. The texture will be irresistibly crispy, providing an exciting contrast to the tender squid inside.
- Zesty Citrus: Incorporate the zest of one lemon or lime into the batter for a refreshing citrus note. This brightens up the dish, making it perfect for warm evenings or as a vibrant appetizer at gatherings.
- Sesame Flavor: Add 1 tablespoon of sesame seeds to your batter for an earthy, nutty flavor. The seeds not only enhance taste but also add visual appeal with their delightful speckled look.
- Asian Twist: Blend 1 tablespoon of five-spice powder into your batter for an aromatic Asian-inspired flavor profile. This will transport your taste buds straight to an exotic street market with every crunchy bite.
- Cheese Crust: For a cheesy touch, fold in ½ cup of grated Parmesan into the batter. This adds a savory richness that pairs beautifully with the delicate squid.
Make Ahead Options
Preparing Salt and Pepper Squid is a fantastic choice for meal prep, allowing you to enjoy this crispy delight whenever the craving strikes. You can clean and cut the squid into rings up to 24 hours in advance, storing them in an airtight container in the refrigerator. Additionally, you can combine the all-purpose flour, cornstarch, salt, and black pepper for the batter ahead of time; just keep it in a sealed bag or jar. When you’re ready to serve, simply dredge the squid rings in the prepared batter and fry them in heated oil for about 2-3 minutes until golden brown. This way, you can have delicious Salt and Pepper Squid on your table in no time while ensuring maximum freshness and crunch!
Salt and Pepper Squid Recipe FAQs
What type of squid should I use for this recipe?
For the best results, opt for fresh or frozen cleaned squid, which you can find at most grocery stores or seafood markets. Look for squid that is firm and has a mild ocean scent. If you’re unsure, baby squid or larger varieties cut into rings work wonderfully!
Can I substitute any of the batter ingredients?
Absolutely! If you want a gluten-free option, you can use a gluten-free all-purpose flour blend in place of regular flour. For added flavor, consider mixing in a teaspoon of garlic powder or cayenne pepper into the batter to give your Salt and Pepper Squid a little kick.
How do I store leftover squid?
If you have any leftover Salt and Pepper Squid, store it in an airtight container in the refrigerator for up to 2 days. To maintain its crispiness, reheat it in an air fryer or bake it in the oven at 350°F (175°C) for about 10 minutes.
Is it possible to freeze the cooked squid?
Yes! You can freeze your cooked Salt and Pepper Squid. Allow it to cool completely before transferring it to a freezer-safe bag. It can be frozen for up to 2 months. When ready to enjoy, thaw in the refrigerator overnight and reheat as mentioned above.
What if my squid is chewy after frying?
If your squid turns out rubbery or chewy, it’s likely due to overcooking. Frying for about 2-3 minutes per batch until they are golden brown is key; they cook quickly! For future reference, ensure your oil is hot enough before adding the squid—aim for around 375°F (190°C) when frying.
How many servings does this recipe yield?
This recipe serves 4 people generously, making it perfect as an appetizer or a main course. Each serving contains approximately 250 calories, so you can enjoy this delightful dish without too much guilt!