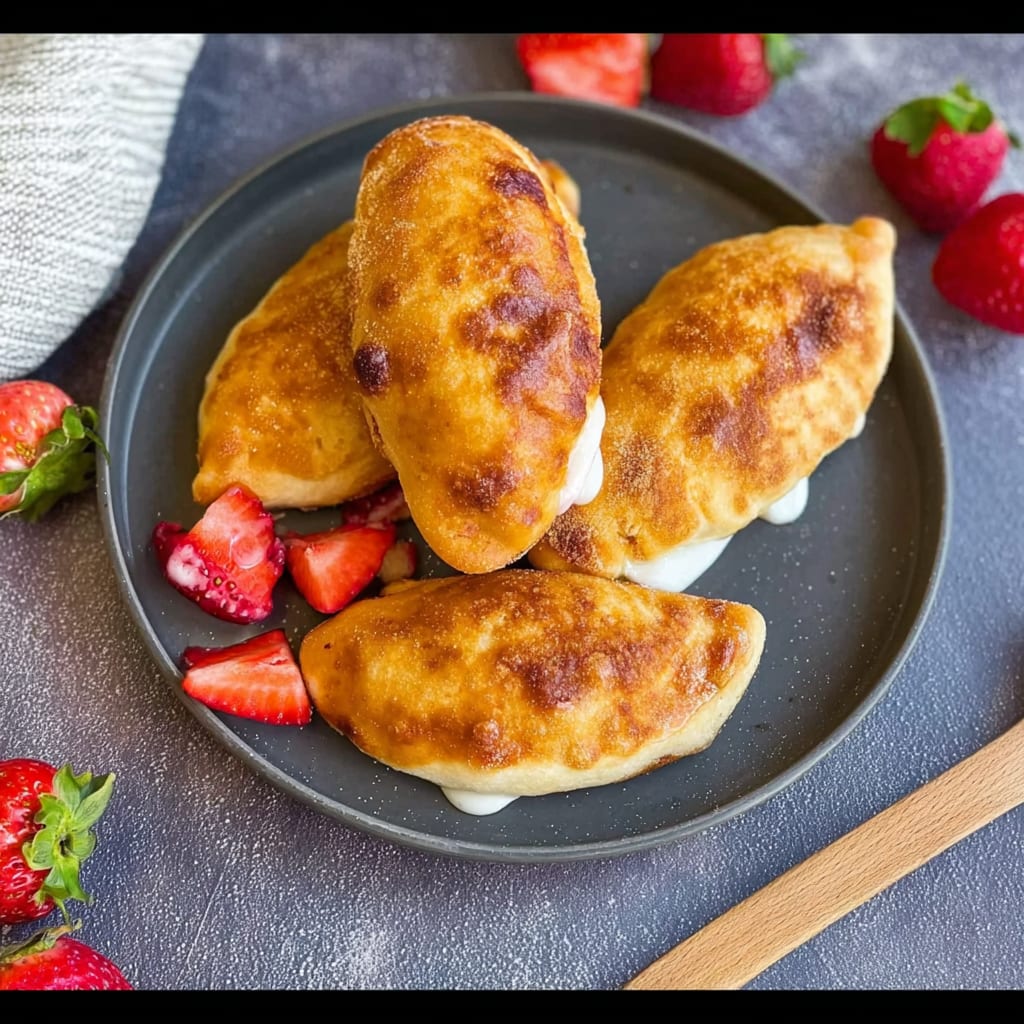
Imagine biting into a warm, golden pastry that bursts with the sweet and tangy flavors of your favorite fruits, sending your taste buds on a joyful ride. Quick Fruit Piroshki (Extra Easy) are not just a treat; they evoke memories of family gatherings where laughter mingled with the delightful aroma of freshly baked goods, making every moment special.
These little pockets of happiness are perfect for any occasion, whether it’s a cozy brunch or an impromptu get-together with friends. With each flaky layer giving way to a luscious filling, you’ll find yourself anticipating that next bite as these piroshki effortlessly steal the spotlight.
Why Will You Keep Making Quick Fruit Piroshki (Extra Easy)?
Deliciously versatile: These piroshki can be filled with your favorite jam or fresh fruit, making them perfect for any occasion!
Time-saving treat: With just 15 minutes of prep and 20 minutes of baking, you’ll have warm, fruity delights ready in no time.
Crowd-pleaser: Their delightful taste and appealing presentation make them an instant hit at gatherings.
Simple ingredients: Made with pantry staples like flour, milk, and sugar, these treats are easy to whip up whenever a craving strikes.
Melt-in-your-mouth goodness: The buttery dough combined with sweet filling creates an irresistible flavor combination you won’t forget!
Quick Fruit Piroshki (Extra Easy) Ingredients
For the Dough
- 2 cups all-purpose flour – This forms the base of your piroshki, creating a soft and tender texture.
- 1 cup milk (warm) – Warm milk helps activate the yeast for a light and fluffy dough.
- 1 packet instant yeast – Instant yeast allows for a quicker rise, making this recipe extra easy!
- 2 tablespoons sugar – Sugar adds a subtle sweetness that balances the fruit filling beautifully.
- 1 teaspoon salt – A pinch of salt enhances all the flavors in your piroshki dough.
- 2 tablespoons butter (melted) – Melted butter enriches the dough, giving it a lovely flavor and moisture.
For the Filling
- 1 cup fruit filling (such as jam or fresh fruit) – Choose your favorite fruit to create a deliciously sweet surprise inside each piroshki.
Step-by-Step Quick Fruit Piroshki (Extra Easy)
1. Combine Ingredients: In a mixing bowl, combine 2 cups all-purpose flour, 1 packet instant yeast, 2 tablespoons sugar, and 1 teaspoon salt. This will be the foundation for your delicious dough!
2. Mix Wet and Dry: Add 1 cup warm milk and 2 tablespoons melted butter to the dry ingredients. Mix until a dough forms, creating a smooth texture that will rise beautifully.
3. Knead the Dough: Knead the dough for about 5 minutes until it’s smooth and elastic. This step builds the structure of your Quick Fruit Piroshki (Extra Easy)!
4. Let it Rise: Place your kneaded dough in a warm spot and let it rise for 30 minutes. It should double in size, becoming fluffy and light!
For the Assembly:
5. Preheat Oven: Preheat your oven to 375°F (190°C). This ensures a perfect baking environment for those golden-brown piroshki.
6. Divide the Dough: Once risen, divide the dough into small balls and flatten each one with your hands. Aim for about 3 inches in diameter to hold that delightful filling.
7. Add Filling: Place a spoonful of your favorite fruit filling (like jam or fresh fruit) in the center of each flattened dough piece. Be generous—it’s what makes these piroshki truly special!
8. Fold Over: Gently fold the dough over the filling, pinching the edges to seal them tightly. This way, none of that sweet goodness escapes during baking!
9. Bake: Place your filled piroshki on a baking sheet and bake for 20 minutes until they are golden brown and fragrant, filling your kitchen with warmth.
Optional: Dust with powdered sugar before serving for an extra touch of sweetness!
Exact quantities are listed in the recipe card below.
Tips for the Best Quick Fruit Piroshki (Extra Easy)
- Dough Consistency: Ensure your dough is slightly tacky but not overly sticky; adjust flour or milk as needed for a smooth texture.
- Warm Rising Spot: Let the dough rise in a warm, draft-free area. A cozy oven (turned off) works wonders to encourage fluffy piroshki.
- Fruit Filling Choices: Opt for thicker fruit fillings like jam or mashed fresh fruit to prevent soggy bottoms and maintain structure during baking.
- Even Sizing: Keep your dough balls uniform in size for even baking; this ensures all piroshki are perfectly golden and delicious.
- Baking Time Watch: Check your piroshki a few minutes before the suggested time; ovens vary, and you want them just golden, not overbaked.
How to Store and Freeze Quick Fruit Piroshki (Extra Easy)
- Room Temperature: Keep your Quick Fruit Piroshki (Extra Easy) in an airtight container for up to 2 days to maintain freshness and avoid drying out.
- Fridge: For longer storage, refrigerate them in a sealed container for up to 5 days. Reheat in the microwave or oven until warm.
- Freezer: Freeze your piroshki individually wrapped in plastic wrap and then placed in a freezer bag for up to 3 months. Thaw overnight in the fridge before reheating.
- Reheating: To enjoy warm piroshki, heat in the oven at 350°F (175°C) for about 10 minutes or microwave for 30 seconds.
Quick Fruit Piroshki (Extra Easy) Your Way
Feel free to embrace your creativity and customize these delightful treats with flavors that make your heart sing!
- Whole Wheat: Substitute half of the all-purpose flour with whole wheat flour for a nuttier taste. This twist adds a delightful texture while keeping the piroshki light and fluffy.
- Vegan: Use almond milk instead of regular milk and replace butter with coconut oil. These simple changes will yield equally delicious results, allowing everyone to enjoy these piroshki without compromising on flavor.
- Spiced: Add a teaspoon of cinnamon or nutmeg to the dough for a warm, aromatic note. This subtle spice enhancement can elevate your fruit filling, creating a comforting experience that’s perfect for chilly days.
- Savory Twist: Swap out the fruit filling for a savory mix like sautéed mushrooms or cheese. This unexpected variation transforms piroshki into a hearty snack, making them perfect for any meal.
- Zesty: Incorporate the zest of an orange or lemon into the dough for a refreshing citrus punch. Not only does this boost flavor, but it also brightens up each bite with a burst of sunshine.
- Berry Blast: Experiment with different fruit fillings like mixed berries or peach preserves. Each combination brings its own unique sweetness, ensuring that every batch is deliciously different.
- Nutty Crunch: Fold in chopped nuts such as almonds or walnuts into the dough for added texture. This variation not only enhances crunchiness but also complements sweeter fills beautifully.
- Spicy Kick: Mix in finely chopped jalapeños or green chilies with your fruit filling for an unexpected heat. This spicy twist adds excitement and depth, making your piroshki unforgettable!
Make Ahead Options
Preparing Quick Fruit Piroshki (Extra Easy) is a delightful way to streamline your meal prep, making those busy days feel a little less hectic. You can easily make the dough ahead of time by mixing together 2 cups of all-purpose flour, 1 packet of instant yeast, 2 tablespoons of sugar, and 1 teaspoon of salt. After adding 1 cup of warm milk and 2 tablespoons of melted butter, knead the dough until smooth and let it rise for up to 3 days in the refrigerator. For the filling, whether you choose jam or fresh fruit, you can prepare that up to 24 hours ahead as well. When you’re ready to enjoy, simply preheat your oven to 375°F (190°C), shape your piroshki, and bake them for about 20 minutes until golden brown. This way, you can savor the warmth and comfort of freshly baked Quick Fruit Piroshki (Extra Easy) even on the busiest of days!
Quick Fruit Piroshki (Extra Easy) Recipe FAQs
What type of flour works best for Quick Fruit Piroshki?
All-purpose flour is perfect for this recipe as it provides a good balance of structure and tenderness. If you’re looking for an alternative, you can use a 50/50 mix of all-purpose and whole wheat flour for a heartier texture.
Can I use any type of fruit filling?
Absolutely! While jam is the classic choice, feel free to get creative with fresh fruits like berries or apples. If using fresh fruit, mash or chop it finely and consider adding a bit of sugar to enhance the sweetness.
How long can I store leftover piroshki?
You can store leftover piroshki in an airtight container at room temperature for up to 2 days. For longer storage, place them in the refrigerator for up to a week, but be mindful that they may lose some freshness.
Can I freeze my Quick Fruit Piroshki?
Yes, these delightful treats freeze beautifully! Once baked and cooled, simply wrap them tightly in plastic wrap and place them in a freezer bag. They can be frozen for up to 2 months. To enjoy, just reheat them in the oven at 350°F (175°C) for about 10-15 minutes until warmed through.
What if my dough doesn’t rise properly?
If your dough isn’t rising after 30 minutes, it could be due to several factors such as using expired yeast or not having warm enough conditions. Ensure your yeast is fresh and try placing the bowl in a slightly warm area, like near a preheated oven (turned off) or covered with a warm towel.
What is the serving size for this recipe?
This recipe yields about 4 servings, with each serving containing roughly 150 calories. These piroshki make an excellent snack or dessert option when shared among friends and family!

Quick Fruit Piroshki
Ingredients
Method
- In a mixing bowl, combine flour, yeast, sugar, and salt.
- Add warm milk and melted butter, and mix until a dough forms.
- Knead the dough for about 5 minutes until smooth.
- Let the dough rise for 30 minutes in a warm place.
- Preheat the oven to 375°F (190°C).
- Divide the dough into small balls and flatten each one.
- Place a spoonful of fruit filling in the center and fold the dough over.
- Place on a baking sheet and bake for 20 minutes until golden brown.