Imagine biting into a velvety square of Chocolate Marshmallow M&M Fudge, where the rich, smooth chocolate melts in your mouth, mingling with fluffy marshmallows and the delightful crunch of colorful M&M candies. The aroma wafts through the air like a sweet hug, instantly lifting spirits and igniting memories of cozy kitchen adventures, laughter, and the joy of sharing treats with loved ones.
As you gather around for a movie night or a festive celebration, this fudge becomes the star of the show, tempting everyone with its decadent layers and vibrant pops of color. With each bite, you’ll experience a playful dance of textures and flavors that promises to leave you craving more—after all, who can resist such a delightful concoction that brings comfort and happiness in every delicious piece?
Why Is Chocolate Marshmallow M&M Fudge So Irresistibly Good?
Quick and easy to whip up, this fudge requires no baking and only 10 minutes of prep time! Decadently delicious, the rich chocolate flavor is perfectly balanced by the sweetness of marshmallows and colorful M&M’s. Versatile and fun, you can customize it with your favorite toppings or mix-ins. Crowd-pleasing for parties or a simple treat, it’s a guaranteed hit with both kids and adults alike!
Chocolate Marshmallow M&M Fudge Ingredients
- For the Fudge Base
- 2 cups chocolate chips (semi-sweet or milk chocolate) – Use semi-sweet for a balanced sweetness or milk chocolate for a creamier flavor.
- 1 cup marshmallows (miniature) – These add a delightful chewy texture and a hint of sweetness to your fudge.
- 1 cup M&M’s (chocolate candies) – Their colorful presence makes this Chocolate Marshmallow M&M Fudge visually appealing and fun!
- 1 can sweetened condensed milk – This ingredient ensures your fudge remains creamy and rich without needing additional butter.
How to Make Chocolate Marshmallow M&M Fudge
1. Combine ingredients: In a microwave-safe bowl, mix 2 cups of chocolate chips with 1 can of sweetened condensed milk. Microwave in 30-second intervals, stirring between each, until the mixture is melted and smooth.
2. Add the goodies: Once melted, gently stir in 1 cup of miniature marshmallows and 1 cup of colorful M&M’s until everything is evenly distributed. You’ll see the chocolate become even more delightful!
3. Set the fudge: Pour the mixture into a greased pan and spread it evenly. Place it in the refrigerator until set, about an hour or so—you’ll want it firm for cutting.
4. Slice and serve: Once set, cut your delicious Chocolate Marshmallow M&M Fudge into squares and enjoy! Each bite will be a burst of chocolatey goodness.
Optional: Sprinkle extra M&M’s on top for a fun presentation!
Exact quantities are listed in the recipe card below.
Expert Tips
- Chocolate Choice: Use semi-sweet or milk chocolate chips based on your family’s preference for sweetness in this Chocolate Marshmallow M&M Fudge.
- Microwave Method: Microwave in short intervals, stirring frequently to prevent overheating and ensure a smooth, creamy texture.
- Marshmallow Evenness: Stir marshmallows in thoroughly to avoid clumps; they should be evenly distributed for that delightful gooeyness.
- Chill Time: Don’t rush the chilling process. Allow the fudge to set completely in the refrigerator; otherwise, it may crumble when cut.
- Cutting Technique: Use a sharp knife dipped in warm water before cutting into squares for clean edges without sticking.
How to Store and Freeze Chocolate Marshmallow M&M Fudge
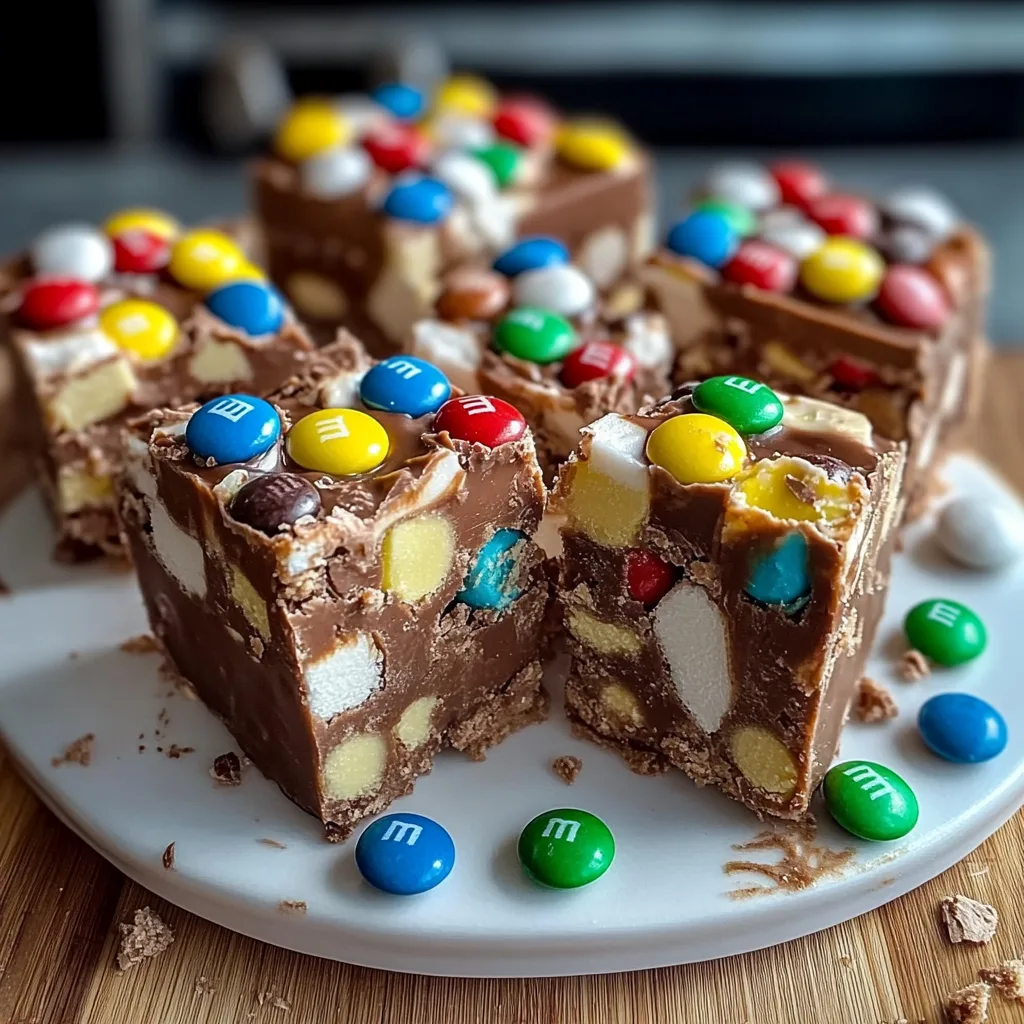
- Room Temperature: Keep your Chocolate Marshmallow M&M Fudge in an airtight container for up to 3 days. This will maintain its delightful texture and flavor.
- Fridge: For longer freshness, refrigerate the fudge in an airtight container for up to a week. Just let it come to room temperature before serving for the best taste.
- Freezer: If you want to save some for later, freeze the fudge wrapped tightly in plastic wrap and then place it in a freezer bag for up to 3 months. Thaw in the fridge overnight before enjoying.
- Reheating: If you prefer warm fudge, gently microwave individual pieces for about 10-15 seconds. Enjoy the gooey goodness of your Chocolate Marshmallow M&M Fudge!
Make Chocolate Marshmallow M&M Fudge Your Own
Feel free to get creative and make this fudge your own with delightful variations that tickle your taste buds.
- Nutty Twist: Replace half of the chocolate chips with chopped nuts for a crunchy texture. Walnuts or almonds add a lovely richness that contrasts beautifully with the sweetness.
- Peanut Butter Bliss: Swirl in ½ cup of creamy peanut butter into the melted chocolate for a decadent, nutty flavor. This combination creates an irresistible blend that’s perfect for peanut butter lovers.
- Festive Colors: Swap out regular M&M’s for seasonal ones, like pastel colors for spring or red and green for Christmas. It adds a playful touch and makes your fudge perfect for any occasion.
- Spicy Kick: Stir in a pinch of cayenne pepper or chili powder to give your fudge a surprising heat. The warmth complements the sweetness in an unexpected way, making each bite exciting.
- Caramel Delight: Add ½ cup of caramel sauce to the fudge mixture before it sets. The gooey caramel creates pockets of sweetness that elevate the overall indulgence.
- Coconut Dream: Incorporate 1 cup of shredded coconut into the mix for a tropical twist. The coconut adds both flavor and texture, making each piece feel like a little slice of paradise.
- Vegan Alternative: Use dairy-free chocolate chips and coconut condensed milk as substitutes for a vegan-friendly version. This option allows everyone to enjoy the rich fudge without compromising on taste.
Make Ahead Options
If you’re looking for a sweet treat that can be prepped in advance, this Chocolate Marshmallow M&M Fudge is a fantastic option! You can prepare the fudge base, combining 2 cups of chocolate chips with 1 can of sweetened condensed milk, and microwave it to a silky smooth consistency up to 24 hours ahead of time. Simply keep the mixture stored in an airtight container in the fridge until you’re ready to finish the recipe. When you’re set to serve, stir in 1 cup of miniature marshmallows and 1 cup of colorful M&M’s. Then, pour it into your greased pan and let it chill for at least 2 hours until fully set. This way, you can save time on busy days while still enjoying that delightful homemade fudge!
Chocolate Marshmallow M&M Fudge Questions Answered
What type of chocolate chips should I use for this fudge?
You can use either semi-sweet or milk chocolate chips, depending on your sweetness preference. Semi-sweet will give a more balanced flavor, while milk chocolate offers a creamier, sweeter taste. Feel free to mix them for a fun twist!
How should I store the Chocolate Marshmallow M&M Fudge?
Store your fudge in an airtight container at room temperature for up to one week. If you live in a warmer climate or prefer a firmer texture, refrigerating it is a great option, where it can last for up to two weeks.
Can I freeze Chocolate Marshmallow M&M Fudge?
Absolutely! Wrap the fudge tightly in plastic wrap and then in aluminum foil before placing it in a freezer-safe container. It can be frozen for up to three months. Just let it thaw at room temperature for about 30 minutes before enjoying!
What if my fudge mixture isn’t melting smoothly?
If your fudge mixture isn’t melting smoothly, try microwaving it in smaller intervals of 15 seconds and stirring more frequently. This prevents overheating and helps maintain a creamy texture. If it’s still clumpy, adding a teaspoon of butter can help smooth things out.
Is there a way to make this fudge healthier?
You can substitute dark chocolate chips for semi-sweet or milk chocolate to reduce sugar content while increasing antioxidants. For fewer calories, try using mini dark chocolate chips along with less sweetened condensed milk—just half a can will do the trick without sacrificing too much creaminess!
Can I adjust the serving size for this recipe?
This recipe makes about 16 small squares (4 servings), each around 200 calories. If you want more or fewer servings, simply double or halve the ingredients accordingly! Just remember to adjust the pan size as needed—an 8×8-inch pan works well for the standard recipe!
More Cozy Seasonal Recipes You’ll Love
- Sugar-Free Creamy Keto Hot Chocolate Recipe
- Keto Eggnog Delight: Festive & Easy to Make at Home
- Irresistible Coffee Butter Cookies for Holiday Bliss
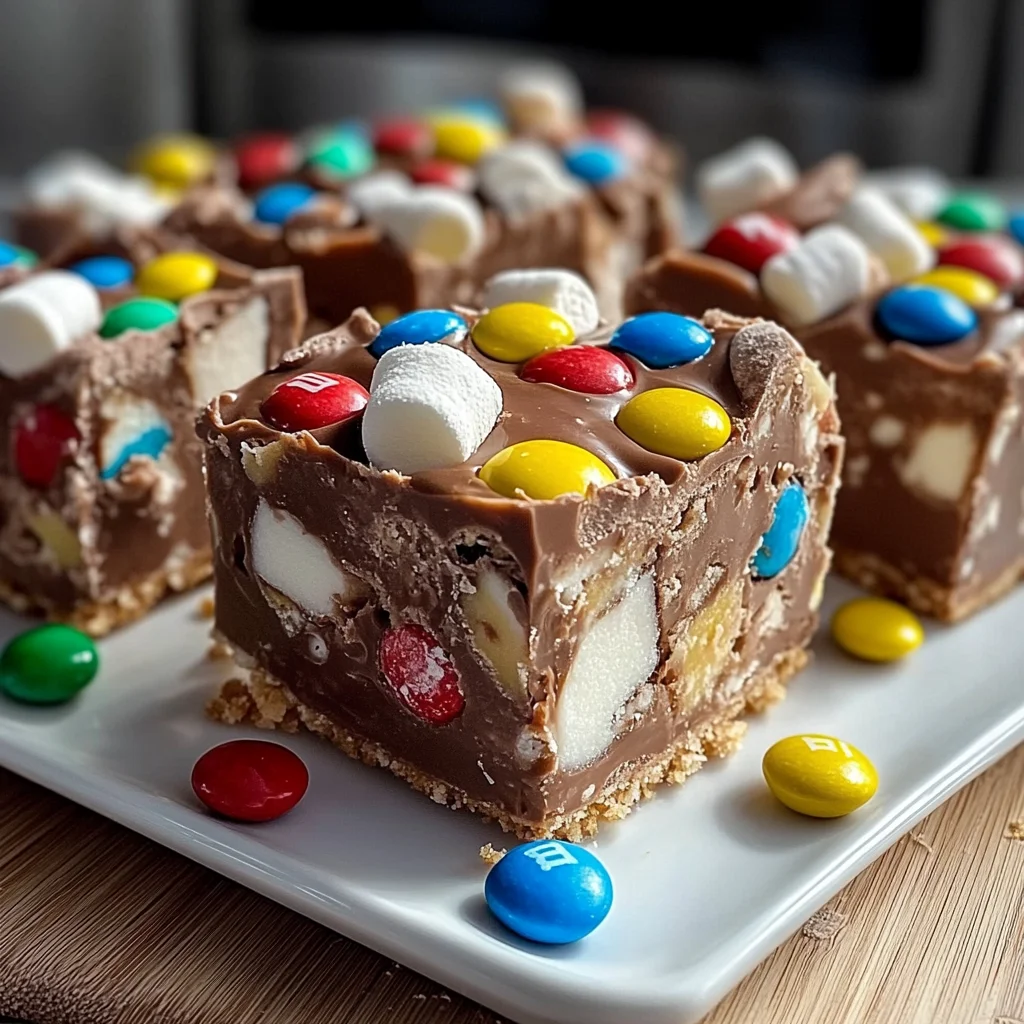
Chocolate Marshmallow M&M Fudge Recipe Card
Prep Time: 10 mins | Cook Time: 20 mins | Total Time: 30 mins | Servings: 4
Ingredients
- For the Fudge Base
- 2 cups chocolate chips (semi-sweet or milk chocolate) – Use semi-sweet for a balanced sweetness or milk chocolate for a creamier flavor.
- 1 cup marshmallows (miniature) – These add a delightful chewy texture and a hint of sweetness to your fudge.
- 1 cup M&M’s (chocolate candies) – Their colorful presence makes this Chocolate Marshmallow M&M Fudge visually appealing and fun!
- 1 can sweetened condensed milk – This ingredient ensures your fudge remains creamy and rich without needing additional butter.
Instructions
- Combine ingredients : In a microwave-safe bowl, mix 2 cups of chocolate chips with 1 can of sweetened condensed milk. Microwave in 30-second intervals, stirring between each, until the mixture is melted and smooth.
- Add the goodies : Once melted, gently stir in 1 cup of miniature marshmallows and 1 cup of colorful M&M’s until everything is evenly distributed. You’ll see the chocolate become even more delightful!
- Set the fudge : Pour the mixture into a greased pan and spread it evenly. Place it in the refrigerator until set, about an hour or so—you’ll want it firm for cutting.
- Slice and serve : Once set, cut your delicious Chocolate Marshmallow M&M Fudge into squares and enjoy! Each bite will be a burst of chocolatey goodness.
- Optional : Sprinkle extra M&M’s on top for a fun presentation!
- Exact quantities are listed in the recipe card below.