Imagine sinking your fork into a slice of Hawaiian Guava Cake, where the tropical aroma of ripe guavas dances around you, tempting your taste buds with its sweet and tangy essence. The moist cake, perfectly complemented by a rich cream cheese layer, creates a delightful symphony of flavors that whisk you away to sun-kissed beaches and warm breezes, making every bite an unforgettable escape.
As I reminisce about family gatherings filled with laughter and love, this cake takes center stage; it’s the star dessert that brings everyone together. Whether it’s a festive luau or a cozy backyard barbecue, the anticipation builds as this vibrant treat emerges from the kitchen, promising a luscious experience that will leave your guests begging for seconds and even thirds.
Why Is Hawaiian Guava Cake Recipe with Cream Cheese Layer Recipe So Irresistibly Good?
Deliciously unique flavors of tropical guava bring a refreshing twist to your dessert table. Moist and fluffy cake layers are perfectly complemented by creamy, rich cream cheese frosting, creating a delightful contrast that everyone will love. Quick prep time of just 30 minutes means you can whip this up for any occasion without the fuss. Versatile enough for birthdays, potlucks, or cozy family gatherings, this cake will impress your guests time and again!
Ingredients for Hawaiian Guava Cake Recipe with Cream Cheese Layer Recipe
For the Cake
- 2 cups all-purpose flour – This is the base for your cake, providing structure and texture.
- 1 cup sugar – Sweetens the cake while helping to create a moist crumb.
- 1 cup guava puree – Adds a tropical flavor and vibrant color to your delightful dessert.
- 1/2 cup butter (softened) – Contributes richness and moisture to the cake.
- 3 large eggs – Binds the ingredients together while adding a lightness to the texture.
- 1 teaspoon baking powder – Helps the cake rise for that perfect fluffy texture.
- 1/2 teaspoon salt – Balances the sweetness and enhances overall flavors.
For the Cream Cheese Layer
- 8 ounces cream cheese (softened) – Provides a tangy richness that complements the sweetness of the cake.
- 1/2 cup powdered sugar – Sweetens the cream cheese layer, making it smooth and creamy.
- 1 teaspoon vanilla extract – Adds warmth and depth to the cream cheese frosting, enhancing its flavor.
Directions: Hawaiian Guava Cake Recipe with Cream Cheese Layer Recipe
1. Preheat the oven to 350°F (175°C). This warm temperature will create the perfect environment for your guava cake to rise beautifully.
2. Cream together the softened butter and sugar in a mixing bowl until light and fluffy. This process incorporates air, resulting in a delightful texture.
3. Add the eggs one at a time, mixing well after each addition. Each egg contributes moisture and richness to your cake, enhancing its flavor.
4. Stir in the guava puree, allowing its tropical sweetness to blend seamlessly into the batter. The vibrant color will bring a cheerful hue to your mixture.
5. Combine the flour, baking powder, and salt in another bowl. Mixing these dry ingredients separately ensures even distribution throughout your cake.
6. Gradually add the dry ingredients to the wet mixture, mixing until just combined. Be gentle here; overmixing can lead to a dense cake!
7. Pour the batter into a greased baking pan and bake for 30-35 minutes or until a toothpick comes out clean. You’ll know it’s ready when it springs back lightly when touched.
For the Cream Cheese Layer:
1. Beat the softened cream cheese in a bowl until smooth. This creates a creamy base that will spread easily over your cake.
2. Add the powdered sugar and vanilla extract, mixing until well combined. This layer adds sweetness and a lovely vanilla aroma that complements the guava perfectly.
3. Spread the cream cheese mixture on top of your cooled cake once it has reached room temperature. This final touch transforms your dessert into an irresistible treat!
Optional: Top with fresh guava slices for added flavor and visual appeal.
Exact quantities are listed in the recipe card below.
Pro Tips for Hawaiian Guava Cake Recipe with Cream Cheese Layer Recipe
- Butter Softening: Ensure your butter is softened but not melted; this creates the perfect texture when creaming with sugar.
- Egg Addition: Add eggs one at a time and mix thoroughly to maintain the cake’s structure and help it rise beautifully.
- Guava Purée Quality: Use fresh or high-quality guava puree for the best flavor. Avoid canned versions with added sugars that can alter taste.
- Baking Time Check: Start checking for doneness at 30 minutes. Overbaking can dry out your Hawaiian Guava Cake, so a toothpick test is essential.
- Cream Cheese Consistency: Make sure your cream cheese is completely softened to achieve a smooth and spreadable frosting that complements the moist cake perfectly.
- Chill Before Serving: Allow the frosted cake to chill in the fridge for 30 minutes before serving; this helps set the cream cheese layer nicely.
How to Store and Freeze Hawaiian Guava Cake Recipe with Cream Cheese Layer Recipe
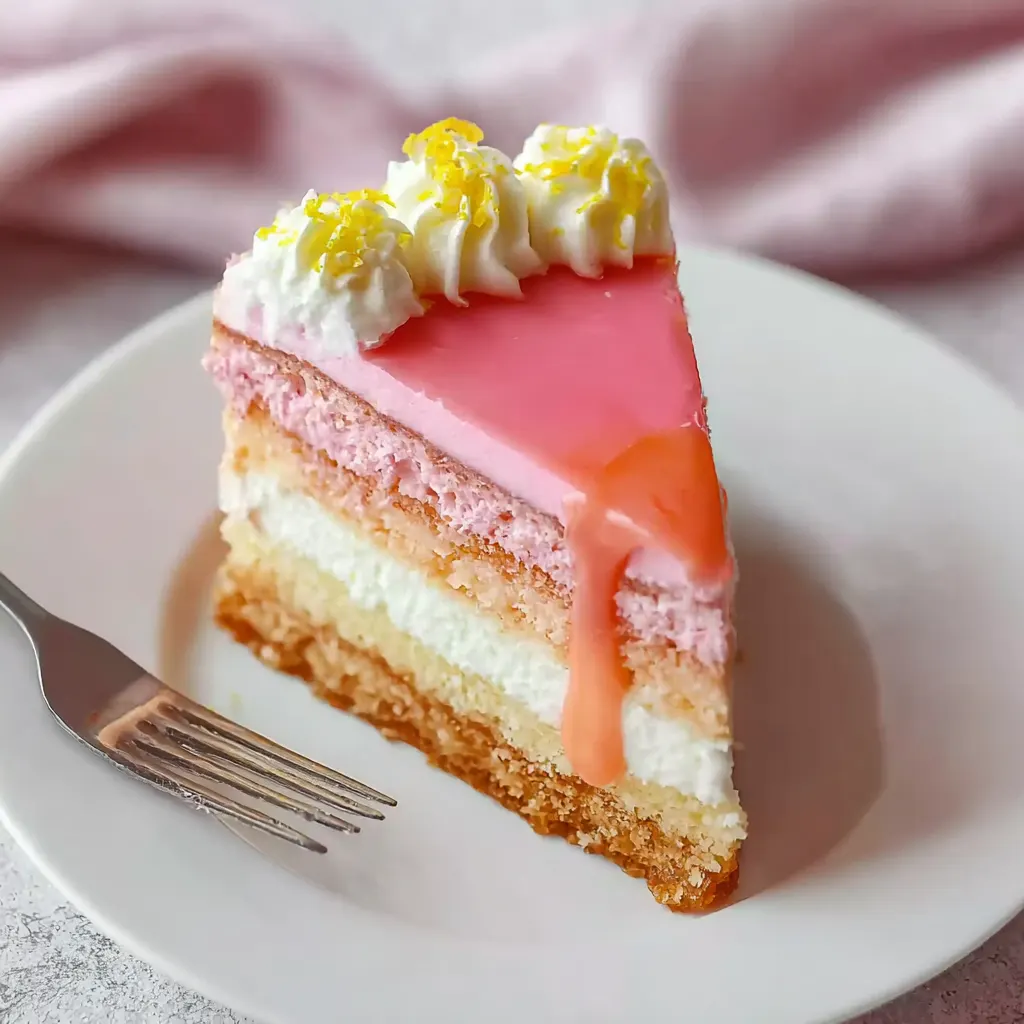
- Room Temperature: Enjoy your Hawaiian Guava Cake Recipe with Cream Cheese Layer Recipe at room temperature for up to 2 days, covered with a cake dome or plastic wrap to keep it fresh.
- Fridge: Store any leftover cake in the refrigerator for up to 5 days. Ensure it’s wrapped tightly or in an airtight container to prevent drying out.
- Freezer: You can freeze the guava cake (unfrosted) for up to 3 months. Wrap it well in plastic wrap and then aluminum foil to protect it from freezer burn.
- Reheating: To enjoy your cake warm, simply thaw in the fridge overnight, then let it come to room temperature before serving. For a warm slice, microwave for about 10-15 seconds.
Hawaiian Guava Cake Recipe with Cream Cheese Layer Recipe Your Way
Feel free to play with this delightful dessert and make it uniquely yours!
- Gluten-Free: Substitute all-purpose flour with a gluten-free blend for a tasty, inclusive option. This swap maintains the cake’s moistness while catering to gluten sensitivities, ensuring everyone can enjoy a slice.
- Fruit Fusion: Swap guava puree with mango or passion fruit puree for a tropical twist. A mix of flavors can create a vibrant and refreshing experience that captures the essence of Hawaiian islands.
- Reduced Sugar: Use 3/4 cup of sugar instead of 1 cup for a lighter version. This allows the natural sweetness of guava to shine through while still delivering a deliciously satisfying dessert.
- Coconut Cream Cheese: Blend in coconut cream into the cream cheese layer for added richness. This variation not only enhances flavor but also adds a creamy texture that complements the guava beautifully.
- Egg-Free: Replace eggs with 1/2 cup unsweetened applesauce for a vegan alternative. The applesauce helps keep the cake moist while adding a hint of sweetness, perfect for plant-based diets.
- Spiced Up: Add 1 teaspoon of cinnamon or nutmeg to the cake batter for extra warmth. These spices infuse the cake with cozy notes that make it feel even more special and comforting.
- Nutty Crunch: Incorporate 1/2 cup chopped macadamia nuts into the batter for an added crunch. The nuts bring texture and enhance the overall flavor profile, making each bite delightful.
- Zesty Kick: Mix in the zest of one lime or lemon into the cream cheese layer for a bright, zesty finish. This citrus addition creates a beautiful balance between sweet and tangy, elevating your dessert experience.
Make Ahead Options
This Hawaiian Guava Cake Recipe with Cream Cheese Layer Recipe is perfect for meal prep, allowing you to enjoy a delightful dessert without the last-minute stress. You can prepare the cake batter ahead of time—mix together 2 cups of all-purpose flour, 1 cup of sugar, 1 cup of guava puree, 1/2 cup of softened butter, 3 large eggs, 1 teaspoon of baking powder, and 1/2 teaspoon of salt. Store it in the refrigerator for up to 24 hours before baking. Additionally, the cream cheese layer made from 8 ounces of softened cream cheese, 1/2 cup of powdered sugar, and 1 teaspoon of vanilla extract can be mixed ahead and kept in the fridge for about three days. Just remember to let the cake cool completely before spreading the cream cheese mixture on top for serving. This way, you save time while ensuring your cake remains fresh and flavorful!
Hawaiian Guava Cake Recipe with Cream Cheese Layer Recipe FAQs
What type of flour works best for the Hawaiian Guava Cake?
While all-purpose flour is the go-to choice for this recipe, you can also experiment with cake flour if you want a lighter texture. Just remember that cake flour has less protein than all-purpose, which can make your cake even fluffier!
How should I store any leftover Hawaiian Guava Cake?
To keep your delicious cake fresh, store it in an airtight container in the refrigerator. It will stay good for about 3-5 days. If you don’t think you’ll finish it within that time, pop it in the freezer!
Can I freeze the Hawaiian Guava Cake?
Absolutely! After baking and cooling the cake, wrap it tightly in plastic wrap or aluminum foil and place it in an airtight container before freezing. It will maintain its delightful flavor for up to 2-3 months. Just remember to thaw it in the fridge overnight before serving.
What should I do if my guava puree is too thick?
If your guava puree is thick, simply mix in a tablespoon of water or juice to achieve a smoother consistency. This will help ensure that your batter mixes well and results in a moist cake.
How many servings does this recipe yield?
This recipe makes about 4 servings, perfect for a small family gathering or an intimate dinner. If you’re expecting more guests, feel free to double the ingredients and use a larger baking pan!
Can I adjust the sweetness of the cream cheese layer?
Yes! If you prefer a less sweet cream cheese layer, reduce the powdered sugar to 1/4 cup instead of 1/2 cup. This allows the creamy tang of the cream cheese to shine through while still complementing the guava flavor beautifully.