Imagine diving into a cloud of creamy, zesty bliss with every spoonful of No-Bake Lemon Cheesecake Jars. The first tangy burst of lemon dances on your tongue, perfectly balanced by the smoothness of rich cream cheese and a buttery graham cracker crust that crumbles delightfully in your mouth. Each jar is a little treasure trove of flavor, effortlessly bringing sunshine to your table, making it the perfect treat for summer picnics or cozy family gatherings.
As I recall the first time I whipped up these jars, laughter filled the kitchen as my kids fought over who got to squeeze the lemons. It became our go-to recipe for birthdays and lazy Sunday afternoons, where we’d sneak spoonfuls straight from the fridge. These No-Bake Lemon Cheesecake Jars promise not just an explosion of citrusy goodness but also joyous memories wrapped in each delightful layer. Perfect for any occasion, they are bound to become a cherished favorite that will keep you coming back for more delicious moments.
Why Will You Keep Making No-Bake Lemon Cheesecake Jars?
Deliciously creamy cheesecake filling meets zesty lemon for a refreshing twist that’ll brighten your day. Quick prep time of just 15 minutes means you can whip these up anytime, leaving you more time to enjoy! No baking required makes it perfect for warm days when you want a sweet treat without heating the kitchen. Versatile and fun, these jars can be customized with your favorite toppings—think berries or chocolate drizzle! Crowd-pleaser alert: they’re an instant hit at parties and gatherings, leaving everyone wanting more.
No-Bake Lemon Cheesecake Jars Ingredients
For the Cheesecake Filling
- 8 oz cream cheese (softened) – Make sure it’s at room temperature for a smooth and creamy texture.
- 1/2 cup sugar – This adds just the right amount of sweetness to balance the tartness of the lemon.
- 1/4 cup lemon juice (freshly squeezed) – Fresh juice will give your cheesecake a vibrant flavor that bottled versions can’t match.
- 1 tsp vanilla extract – A hint of vanilla enhances the overall taste and complements the lemon beautifully.
- 1 cup whipped cream (for folding in) – Use store-bought or homemade for a light, airy filling that melts in your mouth.
For the Graham Cracker Crust
- 1 cup graham cracker crumbs – This forms the base of your jars, adding a delightful crunch and flavor.
- 1/4 cup butter (melted) – The butter helps bind the crumbs together while adding richness to the crust.
- 2 tbsp sugar – A little sugar sweetens the crust, making it a perfect contrast to the creamy filling of your No-Bake Lemon Cheesecake Jars.
Step-by-Step No-Bake Lemon Cheesecake Jars
1. Combine crust ingredients: In a mixing bowl, combine 1 cup of graham cracker crumbs, 1/4 cup melted butter, and 2 tablespoons of sugar. Mix until well combined, creating a sandy texture that will hold together beautifully.
2. Press into jars: Press the mixture firmly into the bottom of each jar or serving glass. Aim for an even layer about half an inch thick—this will be the delightful base for your cheesecake.
3. Beat cream cheese: In a separate bowl, beat 8 oz of softened cream cheese and 1/2 cup of sugar until smooth and creamy. This should take about 2-3 minutes to achieve a light, fluffy consistency.
4. Add lemon and vanilla: Pour in 1/4 cup of freshly squeezed lemon juice and 1 teaspoon of vanilla extract. Mix thoroughly until fully incorporated, allowing the zesty aroma to fill your kitchen.
5. Fold in whipped cream: Gently fold in 1 cup of whipped cream until no streaks remain. This step creates a light and airy filling that will elevate your No-Bake Lemon Cheesecake Jars.
6. Layer the filling: Spoon the cheesecake filling over the crust in each jar, distributing evenly to ensure every bite is luscious and creamy.
7. Repeat layers: Repeat the layers until the jars are filled to your desired height, leaving some space at the top for garnish if you wish.
8. Chill before serving: Chill in the refrigerator for at least 2 hours before serving, allowing all those flavors to meld beautifully and create a refreshing dessert experience.
Optional: Garnish with fresh lemon zest or berries for a pop of color!
Exact quantities are listed in the recipe card below.
Expert Tips
- Cream Cheese Consistency: Make sure your cream cheese is softened to room temperature for a smooth, lump-free filling in your No-Bake Lemon Cheesecake Jars.
- Fresh Lemon Juice: Use freshly squeezed lemon juice instead of bottled for brighter, more vibrant flavor in your cheesecake.
- Whipped Cream Folding: Be gentle when folding in the whipped cream; overmixing can deflate the mixture and ruin the light, airy texture.
- Crust Pressing: Ensure you press the graham cracker crust firmly into the bottom of each jar to create a solid base that holds up when layered.
- Chilling Time: Don’t rush the chilling process! Allow your jars to sit in the refrigerator for at least 2 hours to let the flavors meld beautifully.
How to Store and Freeze No-Bake Lemon Cheesecake Jars
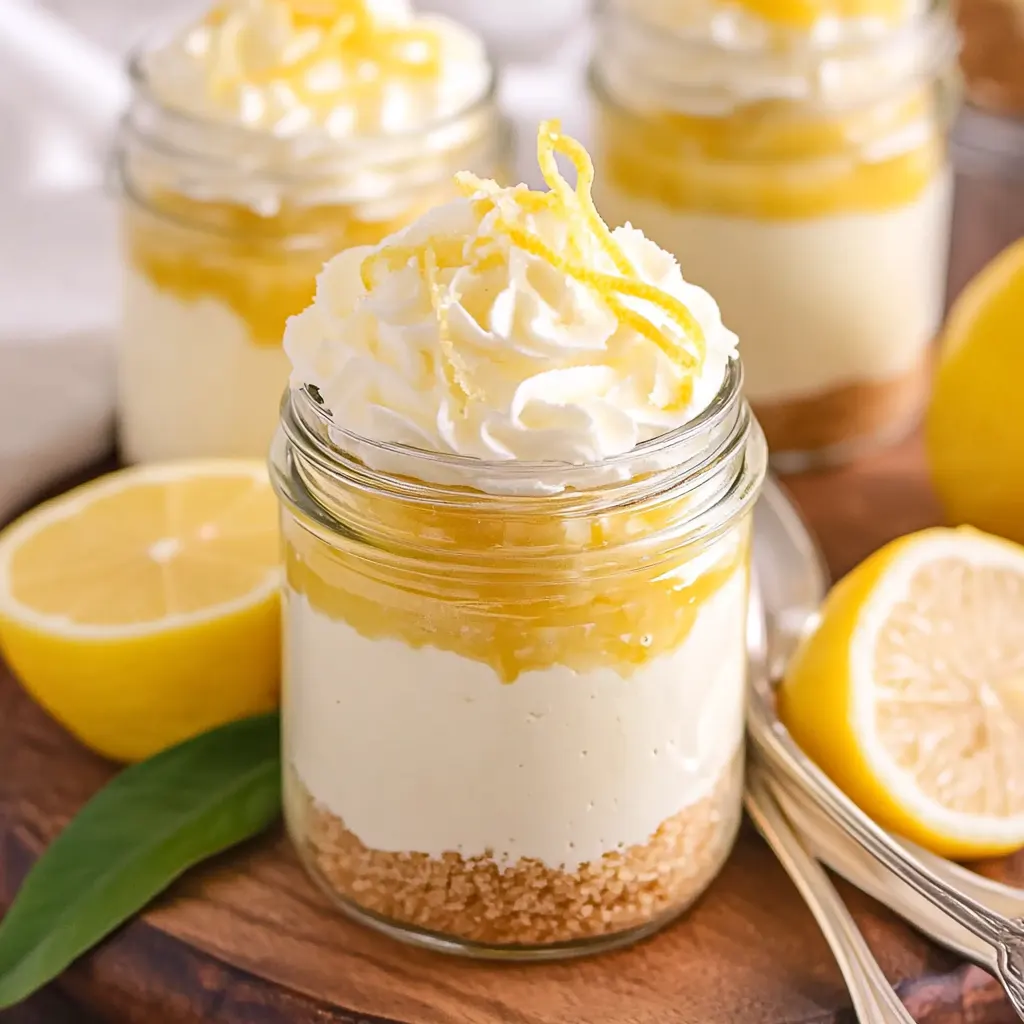
- Fridge: Store your No-Bake Lemon Cheesecake Jars in an airtight container for up to 5 days. Keep them chilled for the best texture and flavor.
- Freezer: If you want to enjoy these delightful jars later, freeze them for up to 2 months. Make sure to use freezer-safe containers and wrap them well to prevent freezer burn.
- Thawing: When you’re ready to indulge, simply transfer the jars from the freezer to the fridge and let them thaw overnight. Avoid microwaving, as it can ruin the creamy texture of the cheesecake.
- Serving: For optimal freshness, serve your No-Bake Lemon Cheesecake Jars within a few days after thawing. Enjoy every creamy, zesty bite!
No-Bake Lemon Cheesecake Jars Your Way
Feel free to play with flavors and textures to make this dessert truly your own!
- Gluten-Free: Substitute graham crackers with gluten-free cookie crumbs for a deliciously inclusive crust. This twist allows those with gluten sensitivities to enjoy the same delightful layers without compromise.
- Low-Sugar: Use a sugar substitute like erythritol or stevia in the cheesecake filling. This option is perfect for those watching their sugar intake but still craving a sweet, zesty treat.
- Berry Bliss: Fold in fresh raspberries or strawberries into the cheesecake mixture for a fruity surprise. The tartness of berries pairs beautifully with the creamy lemon, creating a burst of flavor in every bite.
- Coconut Cream: Replace half of the cream cheese with coconut cream for a tropical twist. This variation not only adds richness but also infuses your jars with a hint of island vibes.
- Chocolate Drizzle: Top the jars with a drizzle of melted dark chocolate before serving. The combination of chocolate and lemon creates an indulgent experience that’s hard to resist.
- Lemon Zest: Add an extra tablespoon of freshly grated lemon zest to enhance the citrus flavor. This simple addition will brighten up your cheesecake, making it even more refreshing.
- Nutty Crust: Swap out some graham cracker crumbs for crushed almonds or pecans in your crust for added texture and flavor. Nuts bring a delightful crunch that complements the smooth filling beautifully.
Make Ahead Options
Preparing No-Bake Lemon Cheesecake Jars is perfect for meal prep, allowing you to enjoy this delightful dessert without the last-minute fuss. You can make the graham cracker crust by combining 1 cup of crumbs, 1/4 cup of melted butter, and 2 tablespoons of sugar ahead of time, pressing it into each jar and storing them for up to 3 days in the refrigerator. For the cheesecake filling, beat together 8 oz of softened cream cheese and 1/2 cup of sugar until smooth, then mix in 1/4 cup of freshly squeezed lemon juice and 1 teaspoon of vanilla extract before gently folding in 1 cup of whipped cream. This filling can be prepared a day in advance as well; just be sure to cover it tightly. When you’re ready to serve, layer the cheesecake filling over the prepped crusts, chill for at least 2 hours, and enjoy a refreshing no-bake treat that’s sure to impress!
No-Bake Lemon Cheesecake Jars Recipe FAQs
What type of cream cheese should I use for the cheesecake filling?
For the best flavor and texture, opt for full-fat cream cheese. It should be softened to room temperature, making it easier to beat into a smooth consistency. Low-fat or whipped cream cheese may result in a less creamy filling.
Can I substitute the sugar in this recipe?
Absolutely! If you’re looking for a healthier alternative, consider using honey, agave syrup, or a sugar substitute like stevia. Just remember that different sweeteners have varying sweetness levels, so adjust according to your taste preference.
How long can I store the No-Bake Lemon Cheesecake Jars in the refrigerator?
These delightful jars can be stored in the refrigerator for up to 3 days. Ensure they’re covered tightly to prevent any unwanted odors from being absorbed. If you plan to enjoy them later, it’s best to wait until just before serving to add any toppings.
Is it possible to freeze the lemon cheesecake jars?
While you can freeze these jars, it’s important to note that the texture may change slightly upon thawing. If you choose to freeze them, make sure they are tightly sealed, and consume within 1 month for optimal flavor. Thaw them in the fridge overnight before serving.
What is the ideal portion size for each jar?
This recipe yields 4 servings, with each jar containing approximately 250 calories. This makes for a perfect dessert portion that feels indulgent without being overwhelming—ideal for satisfying your sweet tooth!
Can I make this recipe gluten-free?
Certainly! Simply swap out regular graham cracker crumbs for gluten-free versions available at most grocery stores. This small change will ensure everyone can enjoy this refreshing dessert without compromising on taste or texture.

No-Bake Lemon Cheesecake Jars
Ingredients
Method
- In a mixing bowl, combine graham cracker crumbs, melted butter, and sugar. Mix until well combined.
- Press the mixture into the bottom of each jar or serving glass.
- In a separate bowl, beat the softened cream cheese and sugar until smooth.
- Add lemon juice and vanilla extract, mixing until fully incorporated.
- Gently fold in the whipped cream until no streaks remain.
- Layer the cheesecake filling over the crust in each jar.
- Repeat the layers until the jars are filled.
- Chill in the refrigerator for at least 2 hours before serving.