Imagine sinking your teeth into a warm, fluffy Ukrainian Garlic Bread, or Pampushky, where the irresistible aroma of freshly baked dough mingles with the bold scent of roasted garlic, creating an experience that dances on your taste buds. Each bite bursts with flavor, delivering a delightful crunch on the outside while remaining soft and pillowy within—perfect for dipping into a steaming bowl of borscht on a chilly evening.
This cherished recipe isn’t just about food; it’s steeped in memories of family gatherings and laughter around the dinner table. Picture yourself sharing stories over this delectable bread, its rich, buttery goodness making every moment feel special. Whether it’s a festive occasion or a cozy weeknight dinner, the anticipation builds as you prepare to indulge in this Ukrainian delight that promises to elevate any meal to extraordinary heights.
Why Is Ukrainian Garlic Bread (Pampushky) So Irresistibly Good?
Soft and fluffy on the inside, these delightful rolls are infused with rich garlic flavor, making them the perfect accompaniment to your favorite soups, especially borscht. Quick to prepare, you can whip up a batch in just 30 minutes, ensuring that even weeknight dinners feel special. Versatile and crowd-pleasing, they’re ideal for gatherings or cozy family meals. Plus, with simple ingredients like flour, yeast, and fresh parsley, you can enjoy homemade goodness without the hassle!
Ukrainian Garlic Bread (Pampushky) Ingredients
For the Dough
- 2 cups all-purpose flour – This forms the base of your Pampushky, giving it that delightful chewy texture.
- 1 cup warm water – Helps activate the yeast for a perfect rise; make sure it’s not too hot!
- 1 packet dry yeast – This is essential for leavening the bread and creating that airy structure.
- 1 teaspoon salt – Enhances the flavor of the bread; don’t skip this step!
- 1 tablespoon sugar – Aids in browning and adds a touch of sweetness to balance flavors.
For the Garlic Topping
- 4 cloves garlic (minced) – Infuses the bread with a robust, aromatic flavor that complements borscht beautifully.
- 1/4 cup butter (melted) – Gives a rich, buttery finish to the Pampushky, making them irresistible.
- 2 tablespoons fresh parsley (chopped) – Adds a pop of color and freshness to your garlic topping, enhancing its appeal.
Step-by-Step Ukrainian Garlic Bread (Pampushky)
1. Combine ingredients: In a mixing bowl, combine 1 cup of warm water with 1 tablespoon of sugar and 1 packet of dry yeast. Let it sit for about 10 minutes until it becomes frothy—a sign that your yeast is active!
2. Knead the dough: Add 2 cups of all-purpose flour and 1 teaspoon of salt to the yeast mixture. Knead until smooth and elastic, then cover it and let it rise for 1 hour in a warm place until doubled in size.
For the Baking:
3. Preheat the oven: Preheat your oven to 375°F (190°C). This ensures a perfectly baked Pampushky that’s golden brown on the outside.
4. Shape the bread: Once the dough has risen, shape it into small balls and place them on a greased baking sheet, leaving space between each one for expansion.
5. Bake to perfection: Bake for about 15 minutes or until they turn a delightful golden brown—this will make your kitchen smell heavenly!
6. Prepare garlic topping: While the Pampushky cool slightly, mix together 1/4 cup of melted butter, 4 minced garlic cloves, and 2 tablespoons of chopped fresh parsley. This aromatic blend will elevate your bread!
7. Brush with love: Brush the garlic mixture generously over the warm Pampushky, ensuring each bite bursts with flavor.
Optional: Serve with a side of borscht for an authentic Ukrainian experience!
Exact quantities are listed in the recipe card below.
Expert Tips
- Yeast Activation: Ensure your water is warm, not hot. Water that’s too hot can kill the yeast, preventing your Ukrainian Garlic Bread (Pampushky) from rising properly.
- Kneading Technique: Knead the dough until it’s smooth and elastic. This helps develop gluten, which is essential for a fluffy texture in the Pampushky.
- Rising Time: Allow the dough to rise in a warm, draft-free area. If it’s too cold, the dough may not rise adequately, resulting in dense bread.
- Shaping Consistency: Make sure to shape the dough balls evenly; this ensures they bake uniformly. Uneven sizes can lead to some Pampushky being overcooked while others are undercooked.
- Garlic Mixture: Brush the garlic topping generously right after baking while the Pampushky are still warm for maximum flavor infusion.
How to Store and Freeze Ukrainian Garlic Bread (Pampushky)
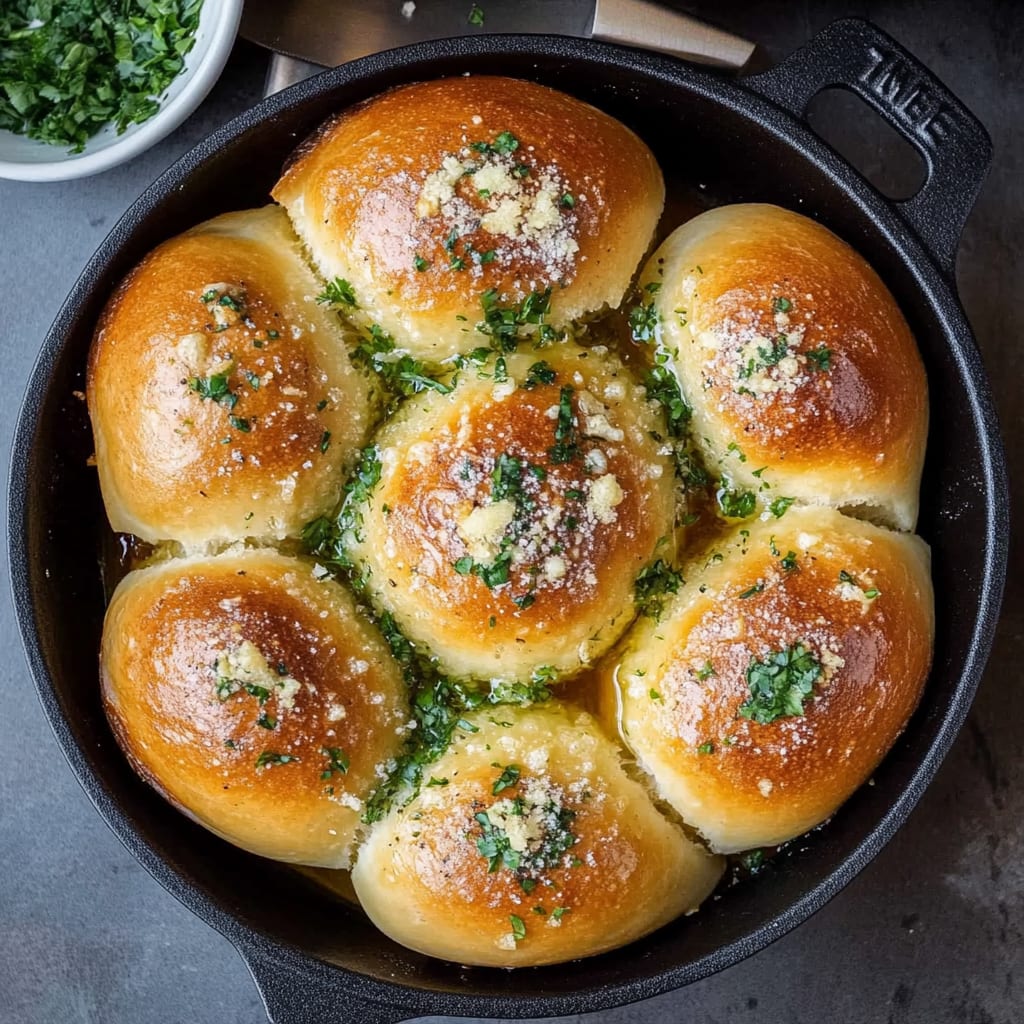
- Room Temperature: Keep your Pampushky in a breadbox or wrapped in a clean kitchen towel for up to 2 days to maintain freshness.
- Fridge: If you need to store them longer, place the Pampushky in an airtight container in the fridge for up to 5 days, although they may lose some texture.
- Freezer: For longer storage, freeze the Pampushky in a single layer on a baking sheet, then transfer to a freezer bag for up to 3 months.
- Reheating: To enjoy again, reheat from frozen at 350°F (175°C) for about 10 minutes or until warmed through, restoring that delightful aroma and taste.
Ukrainian Garlic Bread (Pampushky) Variations
Feel free to explore these delightful twists that will make your homemade bread even more special!
- Herb-Infused: Add 1 tablespoon of dried oregano or thyme to the dough for a fragrant twist. These herbs bring a savory depth that complements the garlic beautifully.
- Cheesy Delight: Mix in 1/2 cup grated cheese, like mozzarella or cheddar, into the dough for a gooey surprise. The melted cheese creates an irresistible, creamy texture that pairs perfectly with the garlicky topping.
- Whole Wheat: Substitute half of the all-purpose flour with whole wheat flour for added nutrition. This swap offers a nutty flavor and heartier texture, making each bite even more satisfying.
- Spicy Kick: Incorporate 1 teaspoon of red pepper flakes into the garlic topping for some heat. This fiery addition can elevate your Pampushky, creating a delicious contrast with the buttery garlic.
- Vegan Version: Use vegan butter in place of regular butter for a plant-based alternative. Your bread will still be rich and flavorful while accommodating vegan diets.
- Onion Boost: Add finely chopped onions to the dough for an aromatic layer of flavor. The sweetness from the baked onions enhances the overall taste experience, making it truly unforgettable.
- Nutty Crunch: Fold in 1/4 cup of chopped walnuts or sunflower seeds into the dough for added texture. This crunchy element adds a delightful surprise in every bite, complementing the softness of the bread.
- Sweet Twist: For something unexpected, mix in 2 tablespoons of honey or maple syrup into the dough. This subtle sweetness balances with the garlic and creates a unique flavor profile that’s hard to resist.
Make Ahead Options
Ukrainian Garlic Bread (Pampushky) is an excellent choice for meal prep, allowing you to enjoy this delightful bread with minimal last-minute fuss. You can prepare the dough up to 24 hours in advance by mixing together 1 cup of warm water, 1 tablespoon of sugar, and 1 packet of dry yeast, letting it sit until frothy. Combine this with 2 cups of all-purpose flour and 1 teaspoon of salt, kneading until smooth, and then allow it to rise for about an hour. For the garlic topping, you can mince the 4 cloves of garlic and chop the fresh parsley up to 3 days ahead and store them in an airtight container in the refrigerator. When you’re ready to serve, shape the dough into small balls, bake them at 375°F (190°C) for just 15 minutes until golden brown, and brush them with a mixture of melted butter, minced garlic, and parsley. This approach not only saves time but also ensures that your Pampushky are fresh and flavorful when it counts!
Your Ukrainian Garlic Bread (Pampushky) Questions, Answered
What type of flour should I use for Pampushky?
You can use all-purpose flour, which is perfect for achieving the right texture in your Ukrainian Garlic Bread. If you’re feeling adventurous, whole wheat flour can be incorporated for a deeper flavor, but it may alter the lightness of the bread.
How do I know if my yeast is active?
To test if your yeast is active, combine warm water (around 110°F or 43°C) with sugar and yeast. Let it sit for about 10 minutes. If it becomes frothy and bubbly, then your yeast is alive and kicking! This step is crucial for creating that fluffy Pampushky.
Can I store leftover Pampushky?
Absolutely! Once they cool down, you can store leftover Pampushky in an airtight container at room temperature for up to 2 days. For longer storage, consider wrapping them tightly in plastic wrap and placing them in the freezer, where they can last for about a month.
What’s the best way to reheat Pampushky?
To reheat your Pampushky, simply place them in a preheated oven at 350°F (175°C) for about 5-7 minutes. This will help restore their delightful softness. You can also microwave them for about 15 seconds; just be careful not to overdo it to avoid drying them out!
How many servings does this recipe yield?
This Pampushky recipe yields approximately 4 generous servings. Each serving contains around 150 calories, making it a delightful addition to your meal without overwhelming your calorie count.
Can I make Pampushky ahead of time?
Yes! You can prepare the dough ahead of time and let it rise as instructed. After shaping the dough into balls, cover them with a damp cloth and refrigerate overnight. When you’re ready to bake, allow them to sit at room temperature for about 30 minutes before popping them in the oven at 375°F (190°C). Enjoy the fresh aroma filling your kitchen!